


Set the scope before choosing paint
Interior painting Rockville projects become easier to price and organize when the work is described room by room. Start by listing the rooms you want painted, then separate walls, ceilings, trim, doors, and any built-in surfaces. A request for “the whole interior” can mean very different work depending on what is included.
Walk through each room and look closely at the surfaces. Note areas with holes, cracks, peeling paint, stains, uneven patches, or damaged plaster. Painting can improve the appearance of a sound surface, but it should not be treated as a substitute for work that needs separate repair or investigation.
Decide what you want changed. You may want a new color on the walls while keeping the ceiling and trim as they are. You may want the doors and baseboards refreshed as well. You may also want repairs completed before the painting starts. Put those choices in the scope rather than leaving them to be guessed from the room itself.
The finish matters too. A flat, low-sheen, or washable finish will create a different look and may suit different uses. If you already know the color, record the color name and finish. If you are still deciding, gather a few samples and look at them in the rooms where they will be used.
Surface condition, the amount of preparation, paint quality, and the size of the area all affect the quote. Access and the number of separate surfaces also matter because they change the labor involved. A clear scope gives you a better starting point than a request based only on the number of rooms.
Before contacting a contractor, have a room list, photos of problem areas, your preferred colors if known, and a description of the repairs you want considered. That information helps turn a broad painting request into work that can be discussed clearly.
Prep decides how the finish looks
Paint reveals more than it hides. Small ridges, loose edges, old patches, and uneven texture can remain noticeable after the color changes, especially where light crosses the wall. Preparation is therefore part of the painting decision, not a minor detail to leave until the end.
Start by asking what condition the surfaces are in. Drywall may need damaged areas filled, smoothed, and blended into the surrounding wall. Plaster may need a different repair approach where it is cracked, loose, or uneven. A patch that feels smooth under a hand can still show through paint if its edges are not feathered into the wall.
Peeling paint needs attention before a new coat is applied. Ask whether loose material will be removed and whether the surface will be made sound before painting. Painting over a failing edge can leave the new finish tied to the same weak surface, so the visible problem may return.
Stains also need to be discussed separately. Ask what caused the stain and whether the source has been addressed before the area is coated. A fresh color may cover the mark for a while, but paint alone does not resolve an active problem behind the surface.
Trim and doors deserve their own inspection. Look for dents, worn edges, old drips, gaps, and areas where previous paint has built up. Ask whether those areas will be cleaned, repaired, sanded, or simply coated. The answer changes both the appearance and the amount of work.
A useful preparation conversation covers these points:
- Drywall holes, dents, seams, and previous patches.
- Plaster cracks, loose areas, and uneven texture.
- Peeling paint, stains, and surfaces that need extra attention.
- Trim, doors, baseboards, and other detailed surfaces.
- Protection for floors, furniture, fixtures, and nearby finishes.
The correct order is to address surface problems before applying the finish coat. That does not mean every imperfection must be made invisible, because existing materials and damage can limit the result. It does mean you should know which repairs are included, which need separate work, and what condition the surface is expected to reach before painting begins.
Preparation can also affect the schedule. More repairs mean more work before the color is applied, and some surfaces need time before they are ready for paint. Ask what has to happen before the first coat and what could change the planned sequence.
A contractor should be able to explain the preparation in plain language. If the description only says “prep as needed,” ask what that means for each room. The phrase can cover anything from light surface cleaning to substantial patching and finishing, so the scope should be made more specific before you compare quotes.
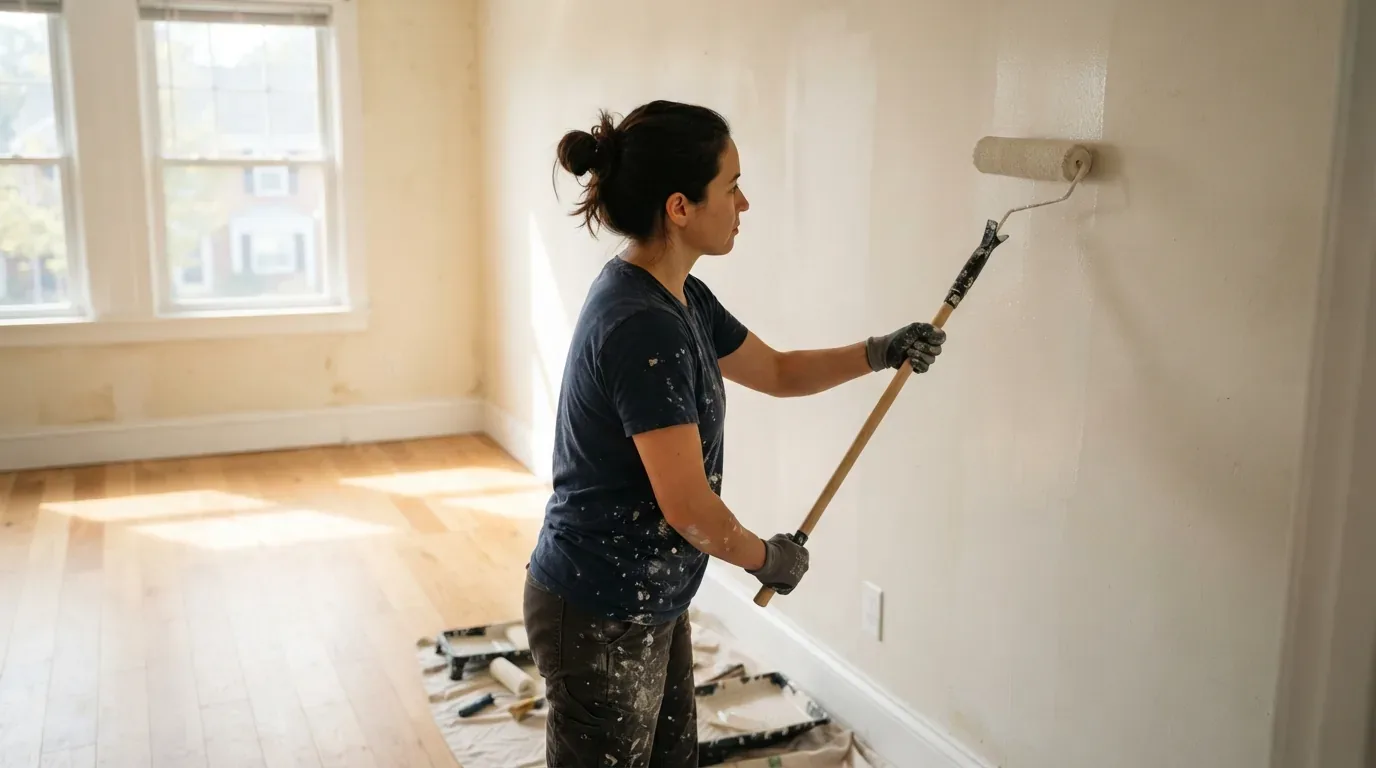
Match color and sheen to the room
Paint selection is not only a color decision. The room’s use, available light, wall condition, cleaning needs, and existing color all deserve attention before you choose a finish.
Begin with the way the room is used. A quiet room may have different demands from a busy hallway, kitchen, bathroom, entry, or children’s space. Ask how often the walls are likely to be touched or cleaned, then discuss a finish that fits that use. A finish that looks good in one room may not be the best choice for every surface in the home.
Light changes the way color appears. Look at samples during the parts of the day when the room is used most. Natural light, lamps, and nearby colors can all affect what you see. A color that feels soft in one room may look stronger or cooler in another, so test it where it will actually be applied.
Existing colors matter as well. A deep or strongly tinted wall may need additional preparation or a different plan before a lighter color looks even. Ask how the current color affects the work rather than assuming the new color will cover it in the same way everywhere.
Wall condition should influence the finish choice. A shinier surface can draw attention to uneven texture, while a lower-sheen surface may give a quieter appearance. That does not make one sheen right for every wall. It means the desired look should be balanced against the condition of the surface and the way the room is used.
Trim and doors can match the walls, contrast with them, or remain close to their current color. Decide whether you want a unified appearance or a visible boundary between the wall and detailed surfaces. Include that choice in the scope so the quote and the final walkthrough are based on the same expectation.
If you are still comparing colors, make the decision manageable. Choose a small group of samples, view them in the room, and check them beside the flooring, cabinets, trim, and furnishings that will remain. The best choice is the one that works with the room you have, not only the color you liked in another setting.
Read the quote line by line
A quote is easier to compare when it describes the work rather than offering one broad amount for painting. The total should be connected to the rooms, surfaces, preparation, materials, and cleanup that you discussed.
Start with the included areas. The quote should identify the rooms and say whether walls, ceilings, trim, doors, closets, or built-ins are part of the work. If a surface is not listed, ask about it before agreeing. An assumption about a ceiling or a set of doors can create confusion later.
Next, look for preparation. Ask how the quote handles drywall or plaster patches, peeling paint, stains, sanding, caulking, and other surface conditions found during the walkthrough. Some repairs may be included, while others may be treated as separate work. The important point is that the difference is clear before work begins.
Materials should also be described. Ask what paint quality is included, who selects the products, and whether the quoted materials match the finish you want. If you have a particular color or product in mind, provide that information before the quote is finalized.
Coats and coverage deserve a direct question. The number of coats may depend on the existing color, the new color, the surface, and the product selected. Rather than assuming that every room receives the same treatment, ask how coverage will be judged and what happens if the existing color shows through.
Protection and cleanup are part of the job experience. Ask how floors, furniture, fixtures, hardware, and nearby surfaces will be protected. Ask what cleanup includes and what condition the rooms should be in when the work is complete.
A practical quote review checks these items:
- Rooms and surfaces included.
- Repairs and preparation included or excluded.
- Paint quality, color, and finish.
- Coats, coverage, and touch-up expectations.
- Protection, cleanup, and handling of changes.
Price is driven by more than wall area. Interior or exterior work, surface condition, paint quality, and the amount of preparation all affect the number. Room access, detailed trim, doors, ceilings, repairs, and protection can also change the labor involved. A quote that accounts for those conditions is more useful than a figure detached from the actual rooms.
Ask how changes will be handled if a hidden problem appears after preparation begins. A clear process should explain how additional repairs are described and approved. You should not have to guess whether a newly discovered issue is part of the agreed work.
The same questions apply if you are hiring for a rental property or coordinating work for someone else. A written scope helps keep rooms, repairs, materials, access, and cleanup aligned between the person arranging the work and the person receiving it.
Read the quote beside your notes from the walkthrough. If one quote is much shorter, it may simply describe fewer parts of the job. Ask for clarification before comparing totals, because different scopes are not true comparisons.

Add a lead-safety checkpoint
Older homes deserve a direct lead-safety question before painted surfaces are disturbed. The age of the home does not tell you everything about every painted surface, but it is a reason to ask how the work will be assessed and handled.
Ask whether the contractor has considered the possibility of lead-based paint and what steps apply before sanding, scraping, cutting, or disturbing older coatings. The question belongs in the planning conversation, not after dust or debris has already been created.
The available guidance for older homes states that painters working on homes built before 1978 must be EPA Lead-Safe Renovation, Repair and Painting certified. If your home falls into that category, ask for confirmation that the person performing applicable work has the required certification. You can also ask how the work area will be controlled and how cleanup will be handled.
Do not treat a new coat of paint as a lead-safety plan. Painting may leave an older coating in place, but preparation methods can disturb it. The right approach depends on the surfaces, their condition, and the work being proposed.
Lead safety should be discussed alongside the ordinary preparation questions. Ask which areas will be scraped or sanded, whether repairs can be completed without disturbing surrounding coatings, and how the work will be separated from occupied areas. If children, pets, tenants, or sensitive occupants use the space, mention that before the scope is written.
Keep the answer with your project records. A quote or work description should make it easier to remember what was discussed about older coatings, preparation, cleanup, and certification. If the answer is unclear, pause the project conversation until the safety question has been addressed.
This checkpoint does not replace an assessment by the appropriate professional. It gives you a practical question to ask before the work starts and helps separate ordinary color selection from the safety decisions that may come with older painted surfaces.
Prepare for the walkthrough and touch-ups
The final result depends partly on how the rooms are ready for work. Before the walkthrough, decide which furniture can be moved, which items need protection, and which walls need attention. Remove fragile objects and clear access to corners, trim, doors, and wall areas where repairs may be discussed.
Tell the contractor about rooms that must remain usable, items that cannot be moved, and surfaces that should not be painted. Mention areas with stains, previous patches, peeling paint, or damage that may not be obvious in a quick visit. Good information at the start makes the scope more useful.
During the walkthrough, look at each room together. Confirm the color, sheen, included surfaces, repairs, and protection plan. Ask how the rooms will be accessed and how changes will be communicated if preparation reveals a condition that was not visible at first.
Keep communication simple during the work. If you notice a question about a color, boundary, door, or trim area, raise it before the next stage makes the change harder. A short written note or updated scope can prevent two people from remembering the same conversation differently.
Inspection should happen in good light. Look at wall coverage, edges, corners, trim lines, doors, patched areas, and places where the old color may show through. Check the surfaces from the normal viewing distance as well as close up, because both overall coverage and detailed edges matter.
Make a touch-up list instead of pointing at problems one at a time while the room is being cleared. Group the list by room and identify the exact area. Then confirm which items will be corrected and when the final cleanup will occur.
Before sign-off, compare the finished rooms with the agreed scope. Confirm that the listed surfaces were addressed, repairs were handled as discussed, protected areas are clean, and touch-ups have been reviewed. If the work changed because of a surface condition, make sure that change is recorded.
A careful walkthrough is not about searching for perfection in every old wall. It is about checking that the completed work matches the agreed preparation, color, finish, coverage, and cleanup. Once those points are clear, get in touch to discuss your rooms and request a quote for the work you want completed.
Frequently asked questions
What services do painters and decorators offer?
Painting work can include color application to walls, ceilings, trim, doors, and other interior surfaces; see our painting services. The scope may also include preparation, drywall or plaster patching, treatment of peeling areas or stains, protection, cleanup, and touch-ups, so ask for each part to be listed.
When should you not paint inside?
Pause interior painting when the surface has an unresolved moisture problem, active damage, loose material, or another condition that paint alone cannot correct. Ask for the underlying condition and needed preparation to be addressed before the finish is applied.
What is the correct order to paint a room?
Start by defining the rooms and surfaces, then inspect and repair the walls, plaster, trim, and other areas that need preparation. Protect the room, prepare the surfaces, apply the agreed finish, and inspect coverage and touch-ups before sign-off.
What do painters typically charge?
Interior painting costs depend on whether the work is interior or exterior, the size of the area, surface condition, preparation, and paint quality. Room access, repairs, detailed trim, doors, ceilings, protection, and cleanup can also affect the quote, so compare written scopes rather than broad figures alone.
What should I ask before painting an older home?
Ask whether older painted surfaces could contain lead and what preparation methods will be used before the work begins. For homes built before 1978, ask whether applicable work will be handled by an EPA Lead-Safe Renovation, Repair and Painting certified painter.
