

How this page helps Silver Spring homeowners
You landed on this page because you want to understand what hiring a handyman for dryer vent installation actually involves and whether that is the right route for your house or rental. We outline the practical choices you will make: when a handyman can handle the work, what the visit looks like on the day, which materials are safer, which permit questions to check locally, and how to prepare so the job goes smoothly.
We wrote this to help homeowners and nearby landlords and property managers weigh the trade-offs without jargon. The goal is to give you clear next steps for a conversation with whoever you choose to call and to help you spot when a specialist or a permit check is the safer option.
How to tell your dryer vent needs work
A dryer vent that needs attention usually gives you clues you can spot before a technician arrives. One common sign is longer drying cycles and clothes that come out hotter than they should, which signals reduced airflow. Another is lint building up around the dryer or the exterior vent cap; visible lint outside or a blocked outside grille are warning signs that the exhaust is not flowing freely. You may also notice the dryer cabinet or exhaust duct feels unusually hot during a cycle, or you smell a faint burning or musty odour when the dryer runs — both are reasons to act sooner rather than later because restricted vents increase fire risk and shorten appliance life.
Physical damage to the venting — crushed or severely bent flexible duct, a disconnected section in an attic, or a deteriorated wall cap — is a clear call for repair or replacement rather than a simple clean. Roof or wall terminations that are corroded, loose, or that allow water or pests in are another reason to schedule work.
Finally, if you only get intermittent relief after cleaning the lint trap, that suggests a deeper clog inside the duct run. In that case it is worth arranging an inspection and, depending on what is found, a more substantial repair or reroute.
What a handyman will actually do
On a straightforward install or repair a handyman follows a logical sequence so you know what to expect on the day. The first task is an on-site inspection: the technician confirms the dryer type and vent route, checks the condition of the existing duct and wall or roof termination, and looks for any safety hazards such as a damaged flexible hose or a lint-filled elbow.
Next the handyman will disconnect the dryer so the work can proceed safely. That usually involves unplugging the unit and moving it a short distance to access the connection; with gas dryers you should ensure the gas line is handled by someone qualified for gas connections, and the handyman will typically advise if a specialist is required. The venting is then tested by feeling for airflow at the exterior termination and by inspecting inside accessible sections with a hand tool or a camera where available.
If the job is a cleaning plus minor repair, the technician will remove lint from the accessible length of duct, brush or vacuum elbows, and clean the inside of the wall cap or roof hood. If replacement or rerouting is needed, the handyman will remove the old ducting and take measurements for the new run, choosing which materials to use based on the route and local best practice.
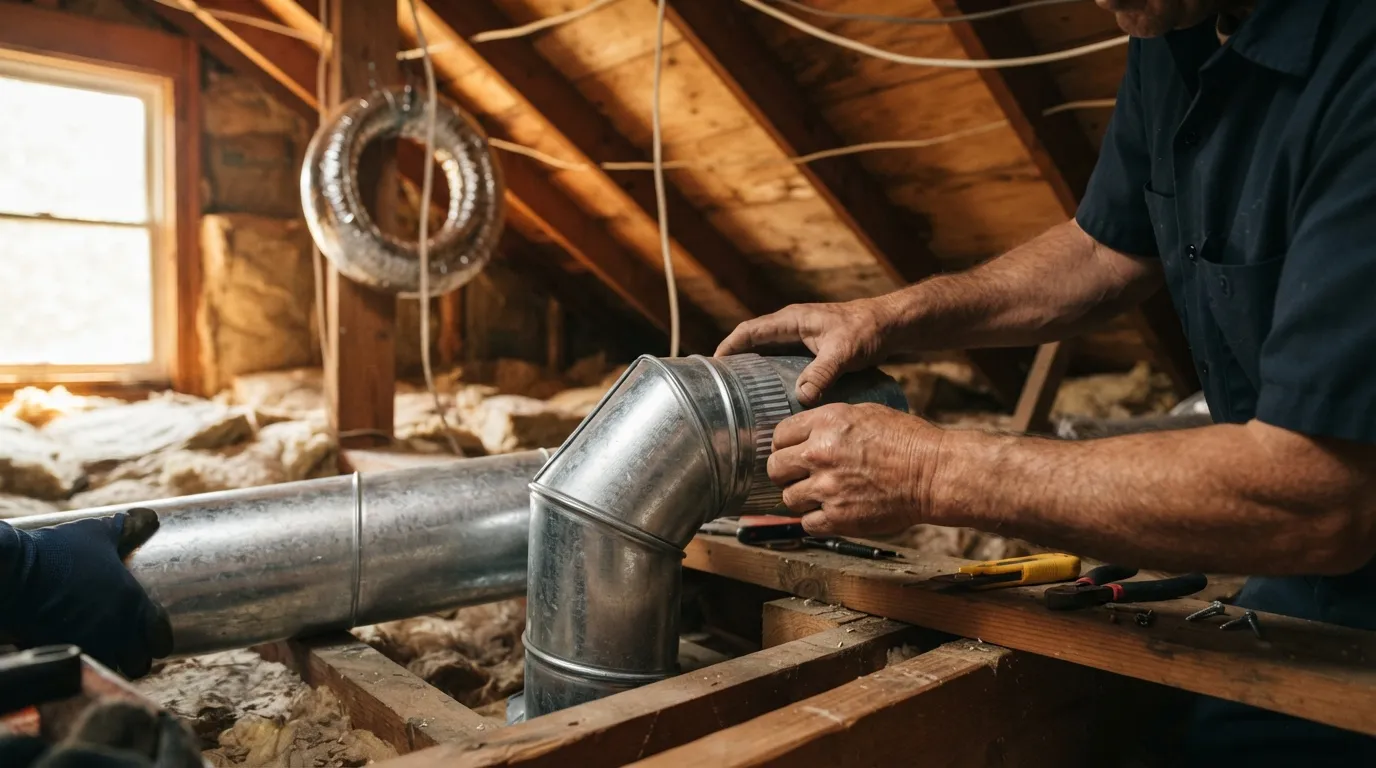
Installing new rigid or semi-rigid metal duct typically means cutting and fitting lengths, joining with approved clamps or metal tape, supporting the duct to avoid sags, and sealing the exterior termination to keep out water and pests. When the route passes through framing or an exterior wall the handyman cuts a neat opening, fits a wall box or vent cap and seals around it so the finish is tidy and weather-tight. If the run goes through an attic the technician will check for obstacles, keep the duct above insulation where possible, and ensure any roof or gable termination meets basic clearances.
A good visit includes testing at the end: the dryer is reconnected, the system is run to confirm airflow and to show you the exterior exhaust, and the work area is cleaned of lint and debris. The handyman will usually point out any further issues discovered during the job and explain whether they recommend a follow-up by a specialist for complex ductwork, roof penetrations, or contamination that goes beyond routine lint removal.
Throughout the visit you can expect the technician to explain the trade-offs you face: the difference between flexible and rigid duct for the chosen route, where a short clean will do and where a reroute or a new wall termination will be worth the extra work, and what access or finish repairs might be needed afterward. That explanation helps you decide whether to proceed immediately or schedule a larger job.

Materials that make vents safer
The material you choose for the duct and the exterior termination has a big effect on safety, longevity and cleaning. Rigid metal duct is widely recommended where you can use it because it keeps the interior smooth and resists crushing and kinks; that makes it easier to keep clear of lint and helps the dryer run efficiently. Semi-rigid metal is a compromise when routing is complicated; it bends to shape but still offers better airflow and durability than thin foil or plastic.
Flexible foil or plastic hoses are convenient but prone to sagging, crushing and lint collection in the folds; these characteristics make them a poorer choice where a permanent, long-lasting run is possible. For exterior terminations, a hooded wall cap or a louvered grille that closes when the dryer is off is preferable to an open pipe, because it keeps rain, pests and drafts out of the duct. Where the vent must pass through an attic or roof, choose an outlet designed for that termination and make sure it is fitted with a backdraft damper to limit cold air and pest entry.
Sealing and support matter as much as the duct type. Smooth joints sealed with metal tape or approved clamps keep lint from catching at seams, and regular supports prevent sags that slow airflow. Where the duct passes through a wall or floor, use a proper vent box or a framed opening so the exterior grille sits flush and the finish can be tidied without pinching the duct. That tidy finish also makes it easier to inspect and clean in future visits.
If a route runs across an attic floor, keep the duct above insulation where possible; ducts lying in insulation collect heat and moisture that accelerate lint buildup and can make cleaning harder. For long runs and multiple bends, a straighter route with fewer elbows will perform better even if it requires a more careful installation, because every elbow reduces airflow and traps lint.
What shapes the final price
Several job-specific factors shape what you will pay for dryer vent work, and understanding them helps you set realistic expectations before you call for quotes. The most important drivers are how easy the route is to reach, how long the duct run must be, what materials you choose, and whether the work is a simple clean, a partial repair, or a full reroute and termination.
Access is a practical cost driver: ducts tucked behind a dryer in a tight laundry alcove, runs that pass through finished walls, or routes that require working in an attic or on a ladder all add time and care. A short repair at the dryer outlet takes less time than cutting a new exterior opening and fitting a new wall cap because the latter involves neat finishing and weatherproofing.
Duct length and complexity also matter. Longer runs and multiple elbows increase both material and labour, because they take more cutting, joining and support work, and because they reduce airflow and often require a more robust duct material. Choosing rigid metal instead of flexible hose raises material costs but reduces the chance of future problems; the trade-off is between immediate expense and longer-term reliability.
The nature of the fix changes the work involved: a cleaning and minor patch is labour-light, while replacing an old run or changing a termination point becomes a small construction job that can include cutting and repairing siding or interior trim. If the work uncovers water damage, pest entry, or insulation issues, expect the scope to grow because those conditions need to be addressed for a lasting repair.
Published labour categories separate dryer-vent technicians, HVAC specialists and general handymen, and published guides show different hourly categories for each trade. That matters because a contractor’s trade affects both how they price their time and which parts of the job they will take on without referral. For budgeting, list what you want done and ask quoting contractors to break the price into the inspection, labour, materials and any follow-on trades so you can compare like for like.
When to call a duct or HVAC specialist
A handyman can handle many installations and repairs, but there are clear situations where a duct or HVAC specialist is the safer choice. Major reroutes that change the path through living spaces, penetrations that require roof work or complicated roof penetrations, and jobs that involve the dryer’s gas connection are all candidates for a specialist referral. Roof terminations in particular come with additional sealing and flashing concerns that a roofing or HVAC pro will manage.
If inspection reveals heavy contamination, persistent mould, or a lint build-up that has progressed into the roof or furnace areas, a specialist with the right containment equipment and cleaning tools should assess the risk and scope of remediation. Likewise, very long runs with multiple elbows that significantly reduce airflow can require design decisions about where to terminate and whether to alter the route that benefit from an HVAC technician’s experience.
When your project crosses building systems — for example, when a vent runs near combustion appliances, furnaces or in shared ductwork — bring in a specialist to check clearances and combustion air issues. A specialist will also be the right call where local code or a manufacturer’s requirements are unclear and you want a definitive answer about whether a particular termination or duct type is permitted.
In practice, a handyman will usually inspect and point out where the job remains simple and where it steps into specialist territory. That inspection is the point at which you and the contractor decide whether to proceed with the handyman scope or to get a specialist quote for the parts that exceed a generalist’s remit.
Do you need a permit or inspection?
Permit rules vary with location, and Montgomery County procedures and inspection requirements should be checked before you start large changes such as adding a new exterior vent or a major reroute. Phone or web contact with the county building or permitting office will tell you whether the specific work you plan requires a permit, what inspections (if any) follow, and whether there are preferred materials or methods for vent terminations.
When you call the county or check their website, ask three focused questions: whether adding or relocating a vent requires a permit, whether the work needs an inspection and at what stage, and whether there are limits on penetration locations or on the types of exterior termination allowed. Having those answers in hand before work begins avoids surprises and lets you compare contractor quotes on an equal footing.
If a contractor suggests a route or a termination that might trigger a permit, ask them to confirm how they handle permits and inspections. That keeps you informed about who will apply for any required paperwork and how the inspection will be scheduled.
How to prepare for the visit
Preparing the space shortens the visit and makes the most of the technician’s time. Clear the dryer area so the machine can be moved easily and give access to the wall opening behind it. Remove laundry, detergent containers and anything stored near the dryer so the technician can work safely and place tools without obstruction.
If the planned route runs through an attic, make access easy by clearing a path in the attic entry and making sure the technician can park where ladders and gear can be unloaded. If you expect the work to require access from the exterior — a wall box or a roof access — let the contractor know about parking restrictions, gate codes or any building entry requirements when you schedule the visit.
Finally, have a short list of priorities ready: what you want fixed now, what you are willing to defer, and whether you prefer a straight replacement or are open to a reroute for better performance. That list makes the on-site decision quicker and helps the technician give you a clear, written estimate for any follow-on work.
If you have questions after the visit, ask the technician for a written scope and a clear breakdown of materials and labour so you can compare quotes or check whether a specialist is needed for any remaining items.
Frequently asked questions
How much should it cost to install a dryer vent?
Costs depend on the length of the run, how easy the duct route is to reach, the materials you choose, and whether the job is a clean, a repair or a full reroute; ask contractors for a breakdown of inspection, labour and materials so you can compare quotes.
Can a handyman install a dryer vent?
Yes — many handymen can handle straightforward installation, replacement and cleaning work; if the job involves roof penetrations, gas connections, long complex runs, or heavy contamination, a specialist may be recommended after inspection.
Who should I call if I find mould or heavy contamination in the vent?
Arrange an inspection and expect to involve a specialist if contamination is extensive; a specialist will have the equipment and protocols to assess containment and remediation beyond routine lint removal.
Do I need a permit in Montgomery County to add or reroute a vent?
Permit and inspection requirements vary, so contact the Montgomery County building or permitting office to ask whether your specific addition or reroute needs a permit, what inspections are required, and whether there are restrictions on termination locations or materials.
