

How should I start with a clear brief and priorities?
For bathroom renovations in Maryland, start with a one-page brief that sets the scope, the must-haves versus the nice-to-haves, and the outcome you want. That single page is what you will give contractors so their quotes answer the same question. Getting the brief right saves time, cuts revision cycles, and makes bids comparable because every contractor prices the same scope.
Write the brief with clarity, not length. Use plain headings for the parts that matter: the non negotiables, what you will accept as an alternative, and the aesthetic direction. Note any site constraints you already know, such as limited access or tight storage for materials. Note if you need to keep another bathroom in service while work proceeds.
What to put on a one-page brief:
- The core scope, described in everyday terms so tradespeople understand what is included
- Must-have fixtures and finishes and the things you can swap for an allowance
- Any structural or layout changes you want to consider as options
- Access and timing constraints the team will need to work around
- How you will decide between competing proposals, for example final price, timeline, or a specific finish
Keep the brief on one page so you can email it with a request for a written quote. When contractors reply, compare them against the brief rather than against each other.
How much disruption to expect and planning timelines
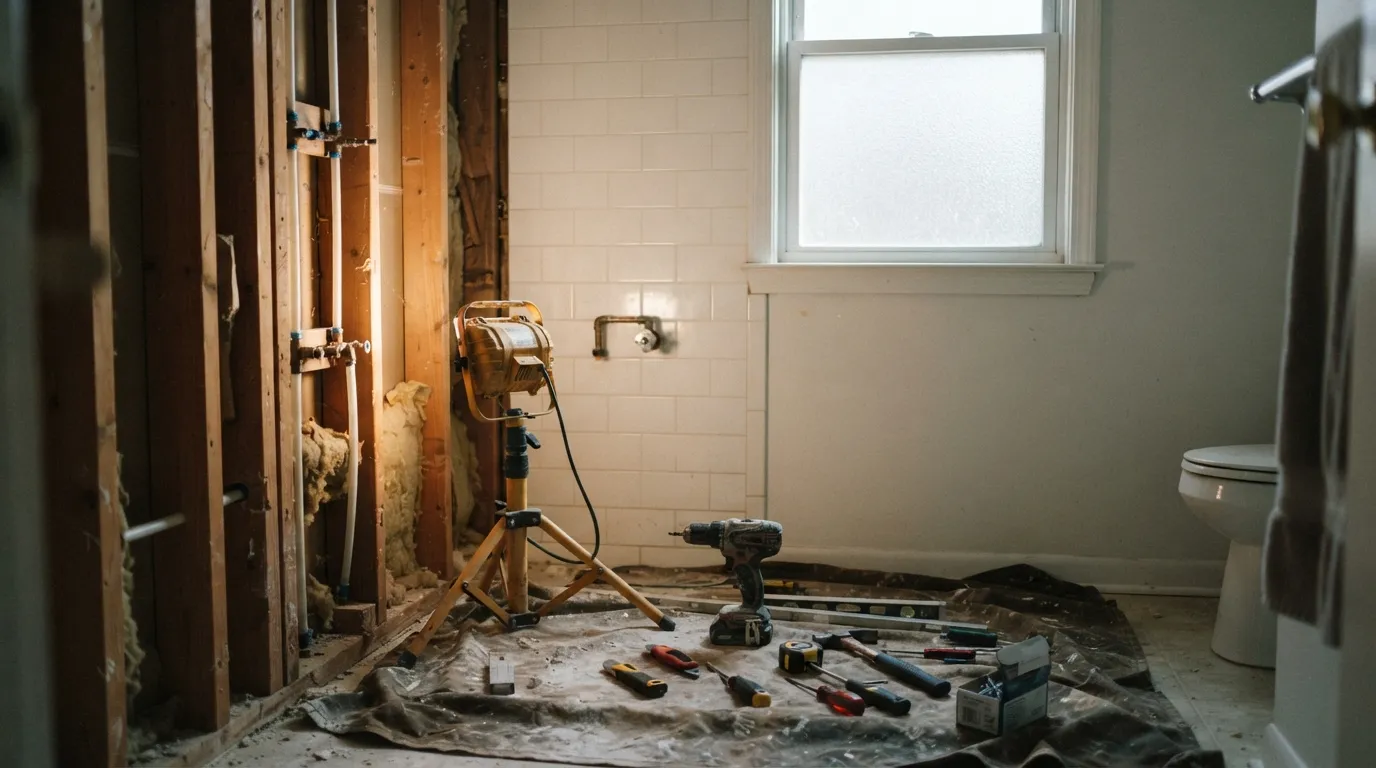
A bathroom rip out is noisy, dusty, and often requires temporary changes to how you live in the home. Expect phases: demo, rough plumbing and electrical, inspections, surface trades, and finishing. Each phase creates its own needs, from dust containment to staging replacement fixtures so a tenant or family member can shower elsewhere.
Plan to isolate the work area. Seal off doorways with plastic and use a zipper door where possible. Put down rosin paper or protective floor covering in adjacent halls. Create a small staging area outside the bathroom where fixtures and tools can sit without blocking a hallway or entry.
Schedule the big trades first. Demo clears the room for plumbers and electricians to rough in. Those trades must be coordinated because routing for pipes and wires can interfere with each other. After rough work and any inspections, drywallers, tile setters and finish carpenters follow. Sequencing matters: an early tile install prevents trades from damaging new finishes, and a late taping and sanding stage lets paint go on cleanly.
If you live in the house while work proceeds, pick a plan for daily life. Block out work hours so noisy tasks happen during the day. Move toiletries and a towel rack to a temporary location. Consider a temporary shower solution if the job will leave you without a working shower for several days.
When tenants are involved, give them a written schedule and a contact for day of work. Build in extra days for deliveries and for any unforeseen repairs that surface once walls are opened. In short, expect disruption and plan for containment, alternate arrangements, and contingency time so the work proceeds without surprises.

Permits in Montgomery County and who applies
Start by asking whether the work you plan involves plumbing or structural changes, relocated electrical, or a change in use of space. Those are the sorts of work that commonly require a permit. The safe approach is to assume that anything that moves pipes, reroutes drains, or changes the footprint may trigger a permit and an inspection.
When you request quotes, ask each contractor whether they will apply for permits or expect you to do it. If a contractor files permits, request to see the permit application and the county permit number before work begins so you can track inspections independently. If you file the permit yourself, insist on a clear scope so the inspection covers what the trades actually install.
Keep copies of all paperwork together. That folder should include the permit card once issued, inspection records, and any shop drawings that were submitted. Those documents are what an inspector will use to verify work. You will show them to a future buyer or property manager to prove the work was done to code.
Inspections usually happen after rough plumbing and electrical are complete, and again at final. Make sure your schedule allows access on inspection days and that no one has sealed the walls prior to a rough inspection. If you or your contractor needs to reschedule an inspection, do it as soon as possible. Failing an inspection delays the next trades and increases the disruption window.
Finally, treat permits as part of project risk management. A proper permit record reduces the chance of having to reopen work later and protects you from unexpected enforcement. If a contractor says they do not pull permits for work that alters plumbing or wiring, that is a clear red flag to investigate further.
What a clear, comparable quote looks like
A quote that is easy to compare names the work and what is explicitly not included. Read every reply against your brief and mark which line items match and which do not. A comparable quote separates labor from materials. It lists allowances where selections are pending. It calls out exclusions like patching beyond the work area or hidden damage found once walls are opened.
Look for the following elements in every quote you receive:
- A clear scope of work that mirrors your one-page brief and notes any deviations
- Line items for each trade so you can see what labor covers and what is an added option
- Allowances for finishes with a method shown for how overruns will be handled
- A description of the payment schedule and what each payment releases
Also check the small print. Exclusions can include things like asbestos or mold remediation, unforeseen structural repairs, or specialized fixture installation. Ask the contractor to convert vague phrases into firm statements. Ask them to replace “may be extra” with a short list of specific conditions that would trigger extra charges.
When comparing, normalise the quotes. If one contractor includes tile setting and another lists it as a subcontract, place both items on a checklist. Compare the total for the same scope. A slightly higher price that includes clear allowances and a dry, written schedule is easier to manage. A low bid that omits items you will later discover is harder to manage.
Choosing finishes that cope with humidity and wear
Bathrooms are a humid, high traffic environment so finishes should be chosen for durability and ease of upkeep, not only looks. Flooring, wall surfaces, grout, and sealants respond differently to humidity cycles and daily cleaning. Your choices should reflect how the room will be used and who uses it.
For floors, nonporous materials that resist water absorption last longer when exposed to splashes and occasional standing water. On walls, tile or water resistant panels avoid repeated repainting in a shower or around a tub. When you choose grout, prefer mixes and installation techniques that reduce shrinkage. Plan to seal where the manufacturer recommends to keep stains and moisture out of joints.
The tub versus shower decision is both functional and long term. A freestanding tub adds visual impact but can complicate tile and waterproofing transitions. A well built curbless shower simplifies access and can be easier to keep clean, particularly in tighter spaces. Consider the drain layout and how a change will affect subfloor and underfloor waterproofing.
Caulk and sealants matter more than most homeowners realize. Use flexible, mold resistant sealants at all junctions between different materials. Match the sealant chemistry to the materials being joined; a silicone product behaves differently on tile than a latex caulk. Have sealant joints inspected and redone after a few months in heavy use. A clean, well tooled joint lasts longer and reduces the risk of water penetration behind finishes.
Fixtures and fittings should be specified with maintenance in mind. Look for trim that is easily disassembled for cleaning, faucets whose cartridges are readily available, and showerheads that resist mineral buildup. For rental units choose finishes that tolerate stronger cleaners and higher turnover of users. Finally, ventilation completes the system: a properly sized exhaust fan on a sensible schedule reduces humidity related problems across all finishes.

Working with landlords and property managers
When you manage rentals, schedule work to fit lease turnovers rather than to convenience a contractor. That reduces the likelihood of tenants being displaced unexpectedly and keeps turnover costs predictable. Clear tenant notices, a brief explanation of the scope and a firm start date reduce complaints and improve cooperation on access days.
Decide in advance whether a quick repair or a full remodel better protects your asset. Quick repairs are appropriate when fixtures are failing but the layout and substrate are sound. Choose a full remodel when repeated repairs are eroding rental income or a layout change will materially increase utility for the tenant.
Document every step for the property file. Keep photos of the pre work condition, the work in progress and the final condition, and attach copies of receipts and permits. These records speed up turnovers, support deposit disputes, and serve as proof if a future buyer or inspector asks about the work.
When you coordinate with a tenant, provide a short written checklist of what they should move and where tools and materials will be staged. Offer a single point of contact for day of work and a short time window for access to limit interruptions.
Schedule, payment, and finishing touches
Agree a payment schedule that links clear milestones to payments. Commonly, a deposit secures a start date. A mid-job draw covers major materials and labor. A final payment follows a walkthrough and the resolution of punch list items. Insist that every payment and milestone be written into the contract so both parties share the same expectations.
Change orders are the most common cause of disputes. When a requested change affects price or time, require a short written change order. It must state the new cost, who will pay for it, and how it shifts the schedule. Signing a change order before the work proceeds keeps the job moving and prevents surprises at the end.
The final walkthrough is where the job becomes finished. Use a checklist that covers grout and caulk, fixture operation, water tightness, tiles set plumb, paint touch ups and trim gaps. Test taps and shower drains, run the exhaust fan and confirm switches are labeled. Ask for any remaining items to be put on a punch list with dates for completion and a single contact to follow up.
Good finishing touches prevent callbacks. Properly tooled caulk joints, sealed tile grout, and securely mounted accessories are small things that tend to fail in the first months after a remodel. Inspect these items before the final release of funds and include them on the punch list so they are not forgotten.
Next steps: getting a local inspection and written quote
Before you call anyone, do a short local inspection of the room. Note where pipes enter and leave, whether walls will need to be opened, and if there is adequate ventilation. Take photos you can attach to your brief so contractors see the same constraints you do.
Ask for multiple written quotes that refer to your one-page brief. Request that each quote lists allowances, exclusions and a proposed sequence of work. When a contractor claims they will pull permits, ask to see the permit reference or the permit application. Verify it with the county.
If you want more detail on sequencing or on what to expect locally, see our pages that explain timing and finishes. Read the note on what to expect in Silver Spring. Compare options on bathroom flooring options. Learn why sequence matters by checking the bathroom remodel order of operations. After you have your brief and a set of comparable quotes, call to arrange an on site visit. The contractor will confirm the details and produce a firm written proposal.
Call to discuss next steps and to arrange a site visit.
Frequently asked questions
How long will a bathroom renovation take from demo to finish?
Timelines vary with complexity, but a typical renovation moves through demo, rough trades, inspections, surface trades and finishes. Expect each phase to need time for drying, inspections, and coordination with other trades. Plan for small delays when walls are opened and hidden repairs are found.
Do I need a permit for plumbing or electrical work in my bathroom?
If the project moves plumbing, relocates drains, or alters electrical circuits, a permit and inspections are commonly required. Ask any contractor you consider whether they will file permits and request to see the permit paperwork so you can track inspections yourself.
What should I ask for in a written quote so I can compare proposals?
Ask for a line by line scope that mirrors your brief, allowances for unfinished selections, explicit exclusions and a clear payment schedule tied to milestones. Also ask for the method that will be used to price changes so you can compare how overruns are handled.
Which finishes hold up best in a small, humid bathroom?
Choose nonporous flooring and wall surfaces, use grout and sealants with good shrinkage resistance, and match sealant chemistry to the materials being joined. Proper ventilation and well tooled caulk joints are as important as the finish itself for long term durability.
How should landlords schedule renovations around tenants?
Schedule work to coincide with lease turnovers when possible. Provide tenants with a written schedule and a single on site contact. Document the condition before and after work. Decide in advance whether a quick repair or a full remodel is the right path for the rental to control cost and downtime.
